
Last updated November 18, 2026
 Wrought iron
 Wood & steel frame
 Farm & ranch
 Sliding driveway gates
 LiftMaster operators
Free on-site gate assessment - hinges, posts, and your LiftMaster or Nice gate operator checked before anything is quoted
The assessment is free and the quote is the invoice.
Get your free estimateGate Installation Warning Signs Every Homeowner Should Know
Hal has pulled apart enough gates that were “brand new” six months ago to know the story before he unbolts the first hinge. The posts are too thin, the welds never had penetration, and the motor has been running on the wrong voltage since the day it was wired. The installer’s truck is long gone, the number on the invoice doesn’t answer, and the homeowner is left holding a quote for a full replacement they already paid for once. Bad gate installs don’t announce themselves on day one. They show up later, when the concrete has cured and the warranty has quietly expired. This guide is about catching them while the concrete is still wet. We work out of Enterprise, and we’ve seen every one of these failure modes in this desert wind and caliche soil. Here’s what to look for.
Quick Answer
The most common gate installation warning signs are undersized posts, cold or incomplete hinge welds, a bottom pivot set without proper clearance, thin or missing paperwork, and a motor wired to the wrong voltage. Any one of these means the gate will fail within a year or two even though it looked fine on install day. Inspect the gate the day the crew finishes, while the concrete is still curing and the installer is still on site to answer for it.
Styles & brands we work with
- Wrought iron
- Wood & steel frame
- Farm & ranch
- Sliding driveway gates
- LiftMaster operators
Table of Contents
- 1. Post Depth and Diameter vs. Gate Weight
- 2. How to Check a Hinge Weld On-Site
- 3. The Bottom Pivot That Binds Within a Year
- 4. Red Flags in the Paperwork
- 5. The Voltage Mistake That Kills Motors
- 6. The Swing Test and the Self-Closing Gate
- 7. Why Enterprise Soil and Wind Accelerate Failure
- Common Mistakes to Avoid
1. Post Depth and Diameter vs. Gate Weight
Undersized posts are the single most common failure Hal sees, and they’re the hardest to fix later. A gate sags in the hinge post, not in the middle, and that is where we start every inspection. If the post was set too shallow or too thin for the weight of the leaf, the gate will lean within a season no matter how many times somebody adjusts the hinges.
Here’s the rule of thumb we use on every install, and it’s a good one for homeowners to hold an installer to:
- Light single swing gate (up to 150 lbs): 4-inch diameter steel post set at least 30 inches deep in concrete.
- Heavier single swing gate (150 to 400 lbs): 6-inch post set 36 to 42 inches deep.
- Double driveway gate (over 400 lbs total): 8-inch posts set 48 inches deep minimum, with the hinge post larger than the latch post.
Those depths are for normal soil. In Enterprise and the surrounding valley, we’re often digging into caliche, that cemented layer that looks like concrete but isn’t. A crew that hits caliche and backs the post out to 20 inches rather than drilling through it is setting up a failure. Ask, before the concrete goes in, how deep the post is going and how wide the hole is. A proper footing is roughly three times the post diameter wide. If the installer can’t answer those two questions, that’s your first warning sign.
Installing a new gate is a measured, scheduled job, not a same-day repair, so we always want to see the post plan in writing before any hole is dug. If you’re weighing a repair against a fresh install, our Gate Installation in Enterprise page walks through what a proper build includes.
2. How to Check a Hinge Weld On-Site
You don’t need a welder’s certification to spot a bad weld. You need your eyes and one hand. Walk up to each hinge after the installer has finished and look at the weld bead where it meets the gate frame and the post bracket.
- Look at the bead. A good weld is a smooth, even row of ripples that ties both pieces of metal together. A cold weld looks lumpy, sits on top of the joint like a blob of toothpaste, and often has visible gaps at the edge.
- Look for spatter and undercut. Little balls of weld spatter around the joint mean the heat was wrong. A groove eaten into the base metal (undercut) means the weld is weaker than the metal around it.
- Put one hand on the gate and rock it firmly. Not a swing, a rock. Side to side, up and down at the latch end. You should feel zero movement at the hinge. Any creak, click, or visible flex at the weld is a problem.
- Ask for proof of on-site welding. A true repair-first shop welds in your driveway. A crew that hauls the gate off to a shop means you can’t see the weld quality, and you can’t hold anyone to it until it fails.
We weld on site so the gate stays in your driveway and you can watch it happen. If an installer won’t weld in front of you, that’s a warning sign worth paying attention to.
3. The Bottom Pivot That Binds Within a Year
A gate that swings perfectly on install day but binds within a year almost always traces back to how the bottom pivot was set. The bottom pivot carries the weight of the leaf. If it’s set too high, the gate rides on the hinge and grinds. If it’s set too low, the leaf drags on the ground and the top hinge works loose trying to hold it up.
Here’s the test. Swing the gate slowly through its full arc, all the way open and all the way closed, and watch the gap between the bottom of the gate and the ground. That gap should stay consistent the whole way through. If it pinches tighter at one end of the swing, the pivot is out of alignment. Also listen: a properly set pivot swings quiet. A grinding or popping sound means metal is riding on metal where it shouldn’t be.
Fix the panel without the post and you’ll fix it twice. The same logic applies to the pivot. If the pivot plate was set into a post that’s already leaning, adjusting the pivot won’t hold. The post has to be right first. This is the kind of thing that turns into a Gate Repair in Enterprise call within the first year, usually right after the installer’s one-year callback window closes.
4. Red Flags in the Paperwork
The paperwork tells you almost as much as the gate. A legitimate installer hands you a written scope of work, a clear price, and a warranty that names what’s covered and for how long. A drive-by crew hands you a handwritten receipt with a first name and a phone number that may or may not answer next spring.
What a real written estimate includes:
- The exact post size, depth, and footing width, not just “new posts.”
- Brand and model of the gate operator if one is being installed, including BFT, Linear, Viking, or Ghost Controls.
- The voltage the motor was wired for and the power source it’s tied to.
- A line-item price that matches what you were quoted on the phone. Upfront pricing means the number doesn’t move at the door.
- A stated warranty period in writing, with what voids it spelled out.
What it should never include: a blank price line, an “estimate subject to change” clause hiding in fine print, or a promise that the crew will “come back and look at it” with no date. Ask for the second opinion on any written estimate you’ve already been handed. We’ll read it with you and tell you straight whether it holds up. That second opinion is free, and it’s worth more than the paper it’s printed on if it saves you from a bad install.
5. The Voltage Mistake That Kills Motors
This one is quiet and expensive. When a gate motor is wired to the wrong voltage at install, it doesn’t usually fail on day one. It runs, it opens the gate, and everybody’s happy. Then, a few months in, the motor starts to sound wrong.
The specific sound to listen for is a low, straining hum that climbs in pitch, sometimes with a clicking relay sound cycling on and off. A motor wired to the wrong voltage is working harder than it was built to. The windings get hot, the control board gets confused, and by the time it fails you’re looking at a motor replacement instead of a fix. On brands like Linear or Viking, a motor that was built for one voltage and fed another is not going to make it a full year, no matter how well it’s rated.
Before the installer leaves, ask them to walk you through three things: what voltage the motor is rated for, what voltage it’s actually receiving, and where the disconnect or breaker for that circuit lives. If they can’t answer all three, hold the check. Any installer who’s been at this a while will happily show you. This is exactly the kind of thing our Gate Motor & Opener in Enterprise service is built around, and it’s why we always want to see the wiring before we quote a motor replacement.
6. The Swing Test and the Self-Closing Gate
Show me the gate closing on its own and I’ll show you where it’s failing. That’s a line Hal uses a lot, and it’s not a dig at self-closing gates. It’s a test. Open the gate about halfway and let go. A well-installed gate with a proper spring or closer should swing closed smoothly under its own weight and settle into the latch with a firm, quiet click.
What a bad install looks like during this test:
- It slams shut. The closer is set too aggressively, and that slam is hammering the latch post every time the gate closes. That post will work loose within a year.
- It stalls halfway. The gate is fighting its own hinge alignment, and the closer is doing more work than it should.
- It bounces off the latch. The latch is misaligned or the gate is out of plumb, and the gate never actually closes without a push.
Run this test three or four times. Time the closure each time and see if it’s consistent. A gate that closes in four seconds once and eight seconds the next time has a problem the installer needs to fix while he’s still there.
7. Why Enterprise Soil and Wind Accelerate Failure
An install that would hold up back east might fail here in two years. The valley soil, the caliche layer, and the wind all make marginal work fail faster. We see posts that were set to a “standard” 24 inches lean within a season because the caliche wasn’t drilled through. We see welds that would have lasted elsewhere crack under the swinging weight a windstorm puts on a big double gate. And we see bottom pivots go out of alignment fast when a footer washes out in a flash flood that the original crew never accounted for.
If you’re in Enterprise and the installer quotes a depth without asking what the soil is like, they’re guessing. Ask them what they do when they hit caliche. Ask them how they set a footer in this ground. The answers tell you whether they’ve done this work locally or whether they drove in from somewhere else this morning. Our Gatewood Fence & Gate Enterprise home page has the shop address if you want to come by and look us in the eye before you let anyone dig.
Common Mistakes to Avoid
- Letting the concrete go in before you’ve seen the hole. Ask to see the depth and width of every footing before the pour. Once that concrete cures, you’re paying to break it out.
- Paying the balance before the swing test. Run the swing test, the rock test, and the closure timing test in front of the installer. Only then hand over the final payment.
- Accepting a warranty that isn’t in writing. Verbal warranties vanish with the installer’s truck. The 90-Day Done Right Promise we put on every job is stamped in writing, and that’s the standard to hold anyone to.
- Letting a crew weld off-site. If the gate leaves your driveway, you can’t see the weld quality and you can’t hold anyone accountable until it cracks.
- Ignoring the motor wiring because “it works.” A motor wired to the wrong voltage often runs fine for weeks. Ask the installer to show you the rated voltage and the actual voltage before you sign off.
- Hiring on a phone quote alone. A number on the phone that changes at the door is the oldest trick in the trade. Insist the written estimate match the phone number.
- Assuming a gate that closes is a gate that’s right. A gate can close fine on install day and still be fighting its bottom pivot every time. That fight shows up a year later as a failed hinge or a burnt-out motor.
See the difference
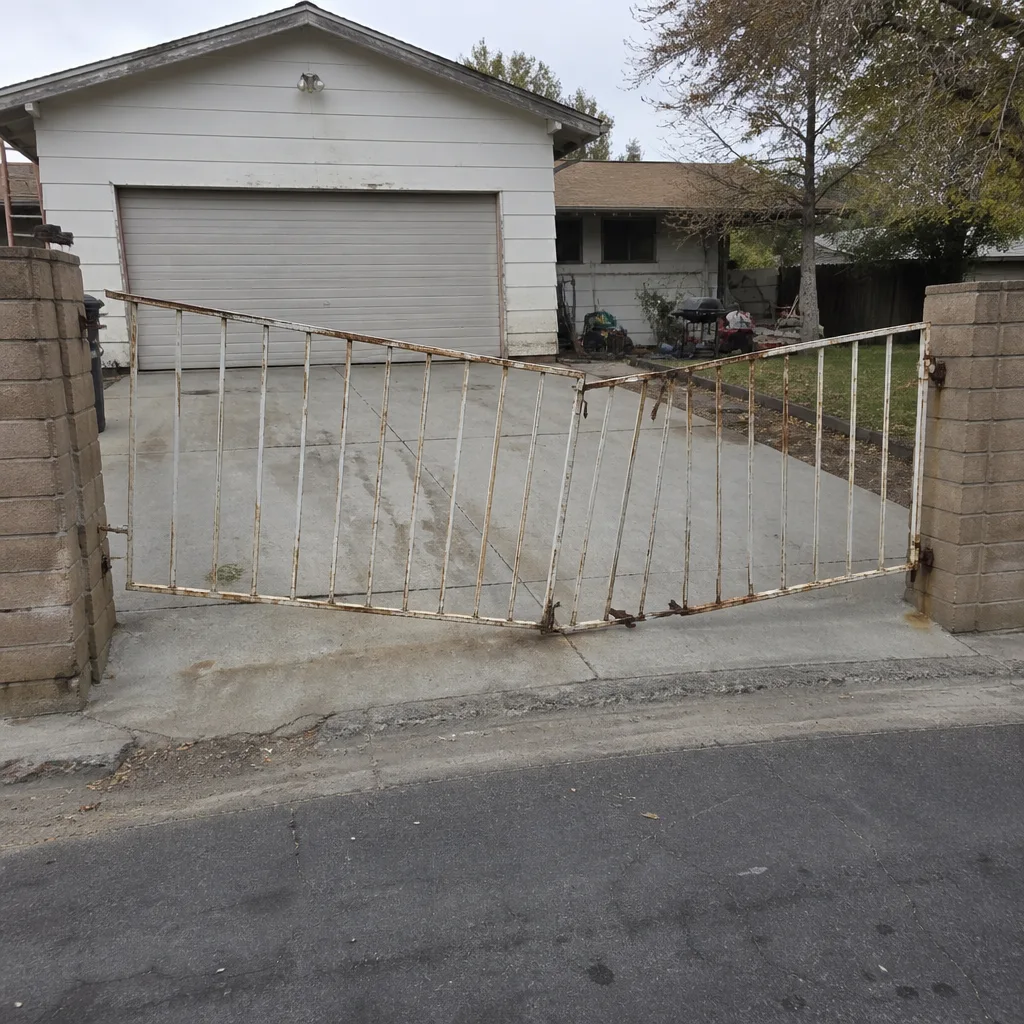 Before
 After
 Before
 After
 Before
 After
When to Call a Professional
Some gate problems are dead stock for a homeowner. If you see a weld with visible cracks, a post that’s shifted out of plumb, a bottom pivot that’s grinding, or a motor that’s humming and clicking, that’s the time to call. Don’t wait for the gate to fall over or the motor to burn out. The cost of a repair now is a fraction of a full replacement later, and the longer you wait, the more likely it is that the whole post needs to come out. We handle gate repair, on-site welding, motor and opener work, access control, and parts for nine major brands, including BFT, Linear, and Ghost Controls. Gatewood Fence & Gate Enterprise offers free estimates in Enterprise. Call (833) 780-1547 and a live person will pick up, day or night.
Frequently Asked Questions
Undersized posts are the single most common warning sign. If the hinge post is too shallow or too thin for the weight of the gate, the gate will sag or lean within a season no matter how many times someone adjusts the hinges. Ask the installer what depth and diameter the post is going before the concrete goes in, and hold them to it.
Look at the weld bead and then put one hand on the gate and rock it firmly. A good weld is a smooth, even row of ripples that ties both pieces together, and it won’t move when you rock the gate. A bad weld looks lumpy, has visible gaps at the edge, and will creak or click under hand pressure.
A gate that binds within a year almost always has a bottom pivot that was set out of alignment. The pivot carries the weight of the leaf, so if it’s set too high or too low, the gate grinds or drags through its swing until the hinge works loose. A gate that was installed with the pivot set against a leaning post can’t be adjusted back into alignment. The post has to be corrected.
A real written estimate should list the post size, depth, and footing width, the brand and model of any gate operator, the voltage the motor is wired for, and a line-item price that matches the phone quote. It should also state the warranty period in writing and what voids it. Anything vaguer than that on a gate install is a warning sign.
A motor wired to the wrong voltage makes a low, straining hum that climbs in pitch, often with a clicking relay cycling on and off. It runs but works harder than it was built to, so the windings overheat and the control board gets confused. On brands like Linear or Viking, a wrong-voltage motor usually doesn’t make it a full year. Call (833) 780-1547 for a free second opinion on the wiring.
Yes, and it’s free. We’ll read through any written estimate you’ve been handed and tell you straight whether the scope, the numbers, and the warranty hold up. If we find a problem, you’ll know before you sign. Call (833) 780-1547 for the second opinion, and a live person will answer.
The Bottom Line
A new gate either holds up or it doesn’t, and the deciding factors are all visible while the installer is still on site. Get the post depth and diameter right, rock every hinge weld by hand, time the swing and the closure, ask what voltage the motor is wired for, and insist on written paperwork that names what’s covered. Do that on install day and you’ll rarely see the failure that shows up six months later. Half of what we see in Enterprise is installs that looked good for a season and started leaning in the second. If you’re not sure what you’re looking at, call. A free estimate now is cheaper than a full replacement later.
Call Gatewood Fence & Gate Enterprise at (833) 780-1547 for a free estimate. A live person answers every call, 24 hours a day, and if it’s not done right, we come back and make it right.
Written by the team at Gatewood Fence & Gate Enterprise.