
Last updated November 18, 2026
 Wrought iron
 Wood & steel frame
 Farm & ranch
 Sliding driveway gates
 LiftMaster operators
Free on-site gate assessment - hinges, posts, and your LiftMaster or Nice gate operator checked before anything is quoted
The assessment is free and the quote is the invoice.
Get your free estimateDIY vs Professional Gate Motor & Opener: What’s Safe to Do Yourself
Most gate motor “emergencies” we get called out to in Enterprise are one of two things: a remote that lost its programming, or a limit switch that drifted a quarter inch. Both are twenty-minute fixes a patient homeowner can do. But here’s the counterintuitive part – the calls that turn into expensive repairs usually start with somebody who was genuinely handy, owned good tools, and just didn’t know where the line was. That line isn’t about skill. It’s about three specific things: the 120-volt feed, the gate’s structural alignment, and whether the system is guarding something that actually matters. This guide walks through what’s safe, what isn’t, and how to tell the difference before you pick up a wrench.
Quick Answer
Reprogramming remotes, cleaning battery terminals, adjusting limit screws, and lubricating the chain or screw drive are all safe for a careful homeowner to handle. Anything involving the 120V power feed, the conduit, welding on the gate frame, or repairing a gate that’s out of alignment is not – those are the jobs where a mistake creates either a shock hazard or a repair bill three times the original problem. If you’re unsure which side of the line you’re on, that uncertainty is your answer.
Styles & brands we work with
- Wrought iron
- Wood & steel frame
- Farm & ranch
- Sliding driveway gates
- LiftMaster operators
Table of Contents
- The Two-Column Test: DIY-Safe vs Call-Somebody
- Low-Voltage Control Wiring vs Line Voltage: How to Tell Which One You’re Looking At
- The Gate Alignment Checks You Can Do With a Level and a Tape Measure
- What “Warranty Void If Opened” Actually Means on Common Motor Brands
- The Two DIY Mistakes That Turn a Minor Fix Into a Major Bill
- Why Enterprise Heat and Wind Change the DIY Math
- Brand-by-Brand Notes: LiftMaster, FAAC, BFT, Linear
- The Tool Kit That Covers 80% of Safe DIY Gate Work
The Two-Column Test: DIY-Safe vs Call-Somebody
Before you touch anything, sort the job into one of two columns. This is the same sort we do in our heads when we pull into a driveway in Enterprise – some things we’ll talk a homeowner through on the phone, and some things we won’t, because the risk isn’t worth the savings.
Genuinely homeowner-safe:
- Reprogramming or replacing remotes and keypad codes
- Cleaning battery terminals and checking battery voltage with a multimeter
- Adjusting limit screws (the small set screws that tell the motor where to stop)
- Lubricating the chain, screw drive, or track with the manufacturer’s recommended grease
- Clearing debris from the track or the gate’s path
- Replacing a photocell (safety eye) that’s the same model as the original – low voltage only
- Tightening exposed bolts on the operator housing
- Resetting the motor after a power outage, per the manual
Call-somebody territory:
- Anything involving the 120V feed, the conduit, the breaker, or the junction box
- Welding a hinge plate back onto the gate frame
- Repairing a gate that’s dragging, sagging, or binding
- Replacing a control board
- Replacing the motor itself
- Any work on a gate guarding a pool, a rental property, or a business
The pattern is simple. If the job is electrical low-voltage or mechanical adjustment, it’s usually safe. If it involves line voltage, structural welding, or a system where failure means a security gap, it isn’t. We’ve seen homeowners in Enterprise save real money on the first column – and lose real money on the second.
Low-Voltage Control Wiring vs Line Voltage: How to Tell Which One You’re Looking At
This is the single most important skill for a DIY-minded gate owner: knowing, before you touch a wire, whether it can hurt you.
Residential gate operators run on two separate electrical systems. The motor itself runs on 120-volt AC line voltage – the same stuff that powers your washing machine. The controls (remotes, keypads, safety edges, photocells, exit loops) run on low-voltage DC, usually somewhere between 12 and 24 volts. Low voltage won’t kill you. Line voltage absolutely can.
Here’s how to tell them apart:
- Trace the conduit. Line voltage comes in through rigid metal or PVC conduit, usually a thicker run from the house or a dedicated breaker. Low-voltage control wires are typically thinner, often in a separate bundle, frequently just buried in a shallow trench or run through flexible conduit.
- Look at the wire gauge. Line voltage is usually 12 or 14 gauge, solid copper, often with a black, white, and green (ground) set. Control wire is thinner – 18 or 22 gauge – and usually has more conductors in a single jacket.
- Find the transformer. Every gate operator has a small transformer inside the control box that steps 120V down to low voltage. If the wire you’re looking at connects on the low-voltage side of that transformer, it’s safe. If it connects on the line-voltage side, it isn’t.
- Check the manual. Every operator manual has a wiring diagram. Find the model number on the housing label and download the manual before you start. In Enterprise, we’ve had homeowners call us with the manual already open – that’s the right instinct.
One more rule: if you’re not sure which is which, treat it as line voltage until proven otherwise. Kill the breaker, test with a non-contact voltage tester, and only then proceed.
The Gate Alignment Checks You Can Do With a Level and a Tape Measure
Half the motor strain we see in Enterprise isn’t a motor problem at all – it’s a gate that’s out of alignment, and the motor is fighting it every cycle. A gate sags in the hinge post, not in the middle, and that’s where the diagnosis starts. You can do this check yourself before you ever call anybody.
- Level check the top rail. Hold a 4-foot level against the top horizontal rail of the gate with the gate fully closed. If the bubble isn’t centered, the gate has dropped on one side. Note which side.
- Plumb check the hinge post. Hold the level vertically against the hinge-side post. A plumb post holds the gate square. A leaning post is the root cause of most sag we see – the gate itself is usually fine, but the post has moved.
- Tape measure the gap at the latch side. Measure the gap between the gate’s latch edge and the fixed post at the top, middle, and bottom. Those three numbers should match within about 1/4 inch. If the top gap is much wider than the bottom, the gate is racked.
- Ground clearance check. Measure the distance from the bottom of the gate to the pavement at the open end and the hinge end. On most residential gates, you want 1 to 2 inches of clearance. If the open end is dragging, the gate has dropped.
- Roller or wheel check. On a rolling gate, spin each roller by hand. Any that catch, grind, or wobble are adding load the motor doesn’t need to fight.
- Manual cycle test. Put the operator in manual release (most have a key or lever) and swing or slide the gate by hand through its full travel. It should move with light, even pressure. Any spot that binds is where your motor is straining.
- Run the motor and listen. Show me the gate closing on its own and I’ll show you where it’s failing – a healthy operator sounds steady. A motor that groans, hesitates, or slows at one point in the cycle is telling you the alignment is off.
If the alignment passes all seven checks and the motor still struggles, the problem is inside the operator – and that’s where DIY stops being a good idea. Our Gate Motor & Opener service in Enterprise starts with the same alignment checks, then works inward.
What “Warranty Void If Opened” Actually Means on Common Motor Brands
This one matters before you pop the cover, because different brands mean very different things.
LiftMaster and Linear residential operators generally include a warranty void sticker over the control box screw. Breaking that sticker can void the warranty on the control board and internal components – but usually not on the motor itself, and usually not on the housing. The board is the piece you’d be risking.
FAAC and BFT commercial and high-end residential operators tend to be a bit more forgiving. Many of their warranties are based on documented installation and maintenance rather than a tamper sticker, so a homeowner who opens the cover to check a fuse or reset a fault code typically doesn’t lose coverage. But the manual is the source of truth – read it before you touch anything.
Here’s the local wrinkle: on a lot of older installations in Enterprise, the warranty is already expired, so the sticker isn’t protecting anything. In that case, opening the cover to clean a terminal or check a fuse costs you nothing. Where the warranty is still live – usually a system installed in the last two or three years – that sticker is worth respecting, and a five-minute call to the manufacturer’s tech line to ask specifically what a cover-opening does to your coverage is time well spent.
Whatever the brand, opening the cover to look isn’t the same as opening the cover to modify. Documenting what you see is always fine. Swapping a control board yourself is where coverage gets tricky.
The Two DIY Mistakes That Turn a Minor Fix Into a Major Bill
We see the same two mistakes over and over in Enterprise. Both start as twenty-minute jobs and end as hundreds of dollars in repair.
Mistake one: adjusting the limit screws without first checking the gate alignment. The limit screws tell the motor where to stop. If the gate is binding halfway through its travel, the homeowner notices the motor straining, assumes the limits are wrong, and adjusts them to compensate. The motor now runs harder through the bind, the gearbox wears, and within a few months the operator has failed completely – when the actual fix was a hinge adjustment all along. Fix the panel without the post and you’ll fix it twice. Same idea.
Mistake two: disconnecting the safety eyes because “they keep beeping.” The photocells are the two small sensors near the ground on either side of the gate. When they’re misaligned, bumped, or dirty, the operator won’t close – so the homeowner unplugs them to get the gate working again. The gate closes fine for a while, until a child, a pet, or a delivery driver crosses the path and the gate doesn’t stop. That’s not just a repair – it’s a liability, and on a residential gate in Enterprise a homeowner’s insurance carrier can deny a claim if the safety devices were bypassed. Clean the lenses, realign the eyes, and if they still won’t work, replace them – don’t disconnect them.
Both mistakes share a pattern: treating the symptom instead of the cause. That’s the whole difference between a repair and a repair that sticks.
Why Enterprise Heat and Wind Change the DIY Math
Gate operating conditions in Enterprise aren’t the same as in a mild climate, and that shifts the DIY calculation in a couple of specific ways.
The summer heat in Enterprise – regularly over 105°F – accelerates the failure of batteries inside solar-powered operators. A solar gate motor that worked fine through the spring starts acting sluggish in July, and the homeowner assumes the motor is dying. Nine times out of ten, the battery just needs to be tested with a multimeter and replaced. That’s a $30 part and a twenty-minute job – genuinely safe DIY, and worth doing before calling anybody. A gate repair in Enterprise call-out for a battery that wasn’t tested is one of the most common things we walk homeowners through on the phone instead of in person.
The wind is the other half. Enterprise and the surrounding desert get sustained wind and dust that work their way into tracks, hinges, and the pivot points on swing gates. That grit adds friction the motor has to overcome, and the friction is exactly what shortens motor life. Track cleaning and lubrication are the two DIY tasks that pay for themselves fastest out here. Do them every three to four months during the windy season and you’ll get years more out of the operator.
The heat also affects wood and metal gates themselves – wood dries and shrinks, metal expands. A gate that was aligned in the spring may have racked by fall. Repeating the alignment checks above once a season is the single most valuable habit a gate owner in Enterprise can build.
Brand-by-Brand Notes: LiftMaster, FAAC, BFT, Linear
Different brands have different DIY ceilings, and knowing yours saves a lot of trial and error.
- LiftMaster – The most common residential operator we see in Enterprise. Well-documented manuals, remotes and keypads that are simple to reprogram, and limit switches accessible without removing the housing. The control board is the DIY stop sign – leave it alone.
- FAAC – Commercial-leaning residential swing operators, especially on older installations. Firmware resets and fault codes on FAAC units are usually in the manual, and the diagnostic display tells you what’s failing before you touch anything. Read the code first – it’s often specific.
- BFT – Similar story to FAAC. Battery backup and photocell systems are usually accessible. The motor and gearbox are not, and forcing the housing open on a BFT is a good way to void coverage on a unit that was well-built to begin with.
- Linear – Common on sliding gates. Limit switches and safety edges are DIY-friendly. Control board swaps are not, and the Linear boards are specific enough that using the wrong replacement causes damage the manual won’t warn you about.
For a wider view on how a full Gatewood Fence & Gate Enterprise service call handles these brands, our approach is straightforward: repair what can be repaired, replace only what genuinely needs it, and back the work with a written 90-Day Done Right Promise.
The Tool Kit That Covers 80% of Safe DIY Gate Work
If you’re going to do the low-voltage and mechanical work yourself, here’s the kit that gets you through it. Nothing exotic, and most homeowners already own half of it.
- Non-contact voltage tester. The single most important tool. Test every wire before you touch it – five dollars, saves your life.
- Digital multimeter. For checking battery voltage, verifying low-voltage DC at the photocells, and confirming continuity.
- 4-foot spirit level. The alignment checks above are impossible without one.
- 25-foot tape measure. Gap measurements at the latch side need real numbers, not eyeball guesses.
- Socket set and screwdriver set. Standard sizes cover the vast majority of residential operators.
- Manufacturer-specific grease. Check the manual – the wrong grease on a screw drive attracts grit and makes things worse, especially in Enterprise dust.
- Padded work gloves. Gate frames are sharp and the heat out here turns metal housings into something you don’t want to grab barehanded.
No welding equipment on this list, and no wire strippers for anything thicker than control wire. Those are the tools that belong to a pro – and the jobs they belong to are the ones where a mistake costs more than a service call.
Common Mistakes to Avoid
- Skipping the voltage test before touching a wire. Non-contact testers cost five dollars and prevent the worst possible outcome. Test every wire, every time, even if you think you know what it is.
- Adjusting limits to fix a binding gate. The limits are almost never the problem when a gate binds – the alignment is. Adjust the gate first, then the limits.
- Using the wrong grease in the desert dust. Heavy wet grease attracts the grit that blows around Enterprise, turning a lubrication job into an abrasive paste. Use what the manufacturer specifies, and reapply on the seasonal schedule.
- Ignoring the photocells because they’re “annoying.” Safety eyes aren’t optional, and bypassing them creates both a liability and an insurance problem. If they fail, replace them.
- Assuming a battery problem is a motor problem. The July sluggishness on a solar gate in Enterprise is almost always the battery. Test it before scheduling a service call.
- Opening a control box under live warranty “just to look.” Read the manual first. A five-minute cover opening can cost the coverage on a $300 board.
- Welding anything on the gate frame. Welding is the one mechanical task that a homeowner should never take on. A weld bead that fails at speed sends a gate swinging into whatever is in its path.
See the difference
 Before
 After
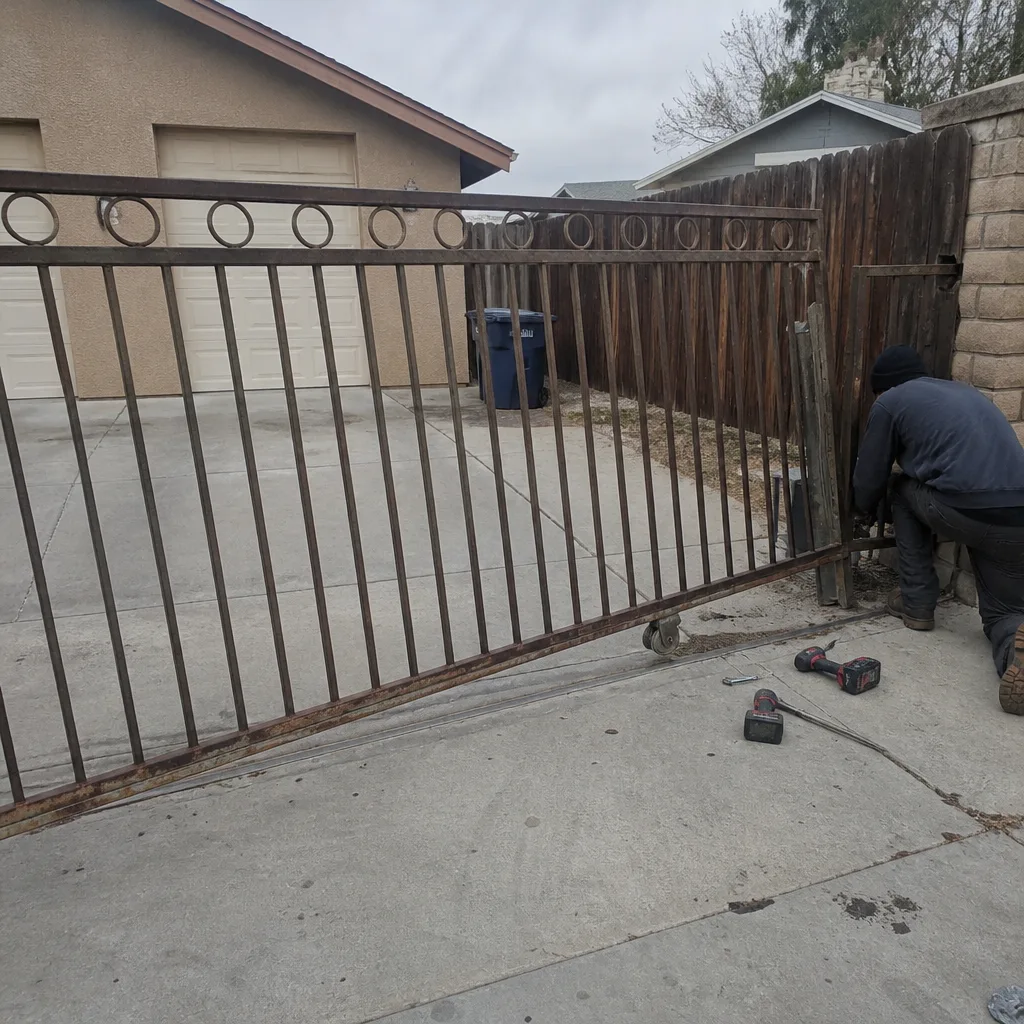 Before
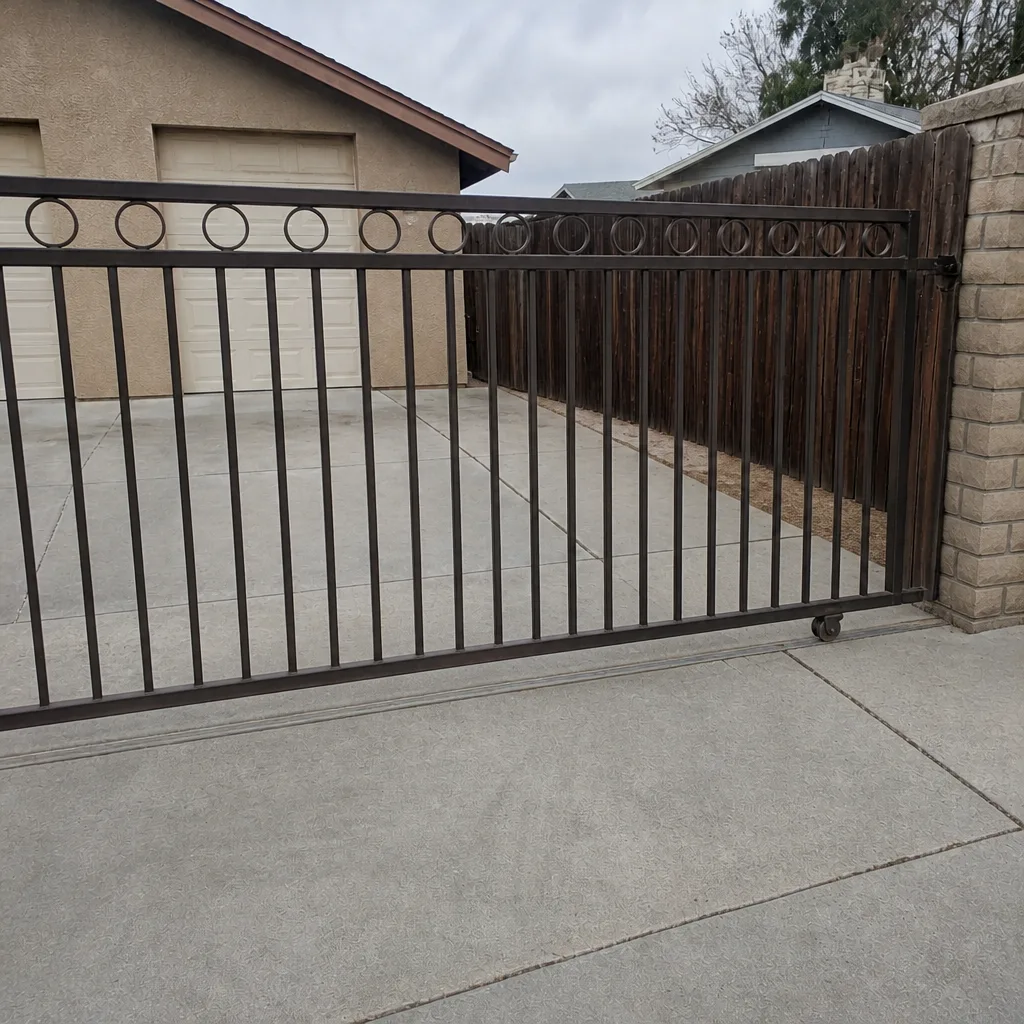 After
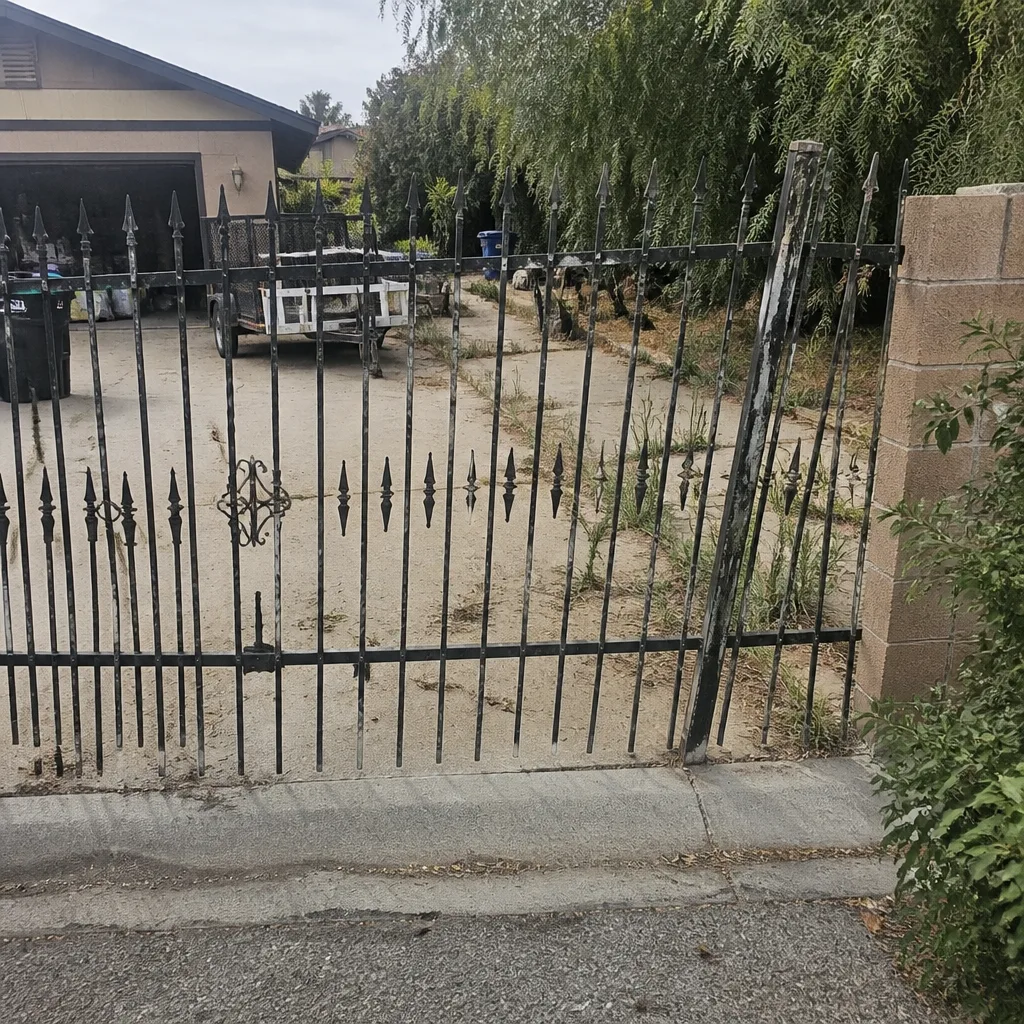 Before
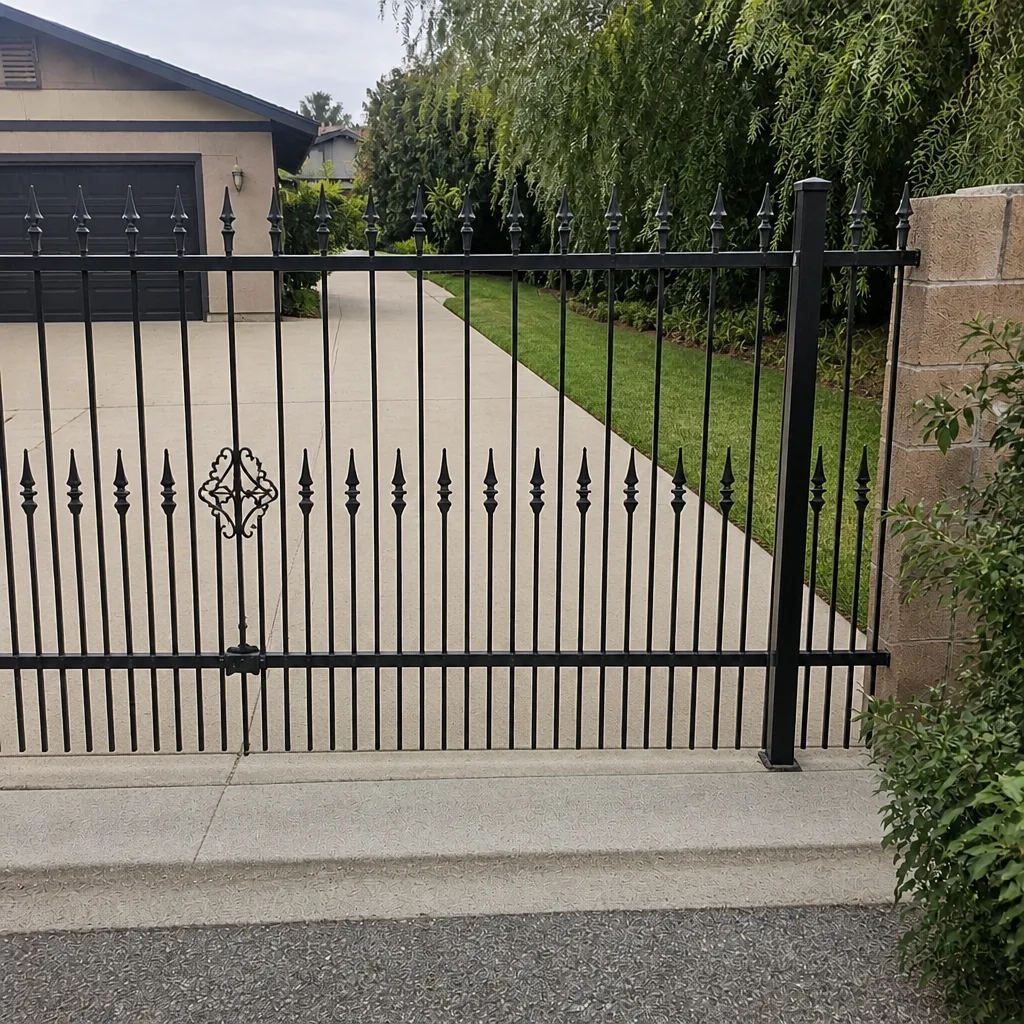 After
When to Call a Professional
Call a professional any time the work involves the 120V feed, the breaker, the conduit, or a junction box – that’s not a skill question, it’s a safety one. Call when the gate is out of alignment and the alignment checks above show a sagging hinge post or a racked frame. Call when the motor, gearbox, or control board is the failed component. Call when a photocell or safety edge is part of a system guarding a pool, a rental, or a business. Call when a gate has stopped responding altogether and the manual reset didn’t fix it. And call when you’ve lost confidence halfway through a job – a pro would rather finish a repair you started than repair a repair you finished. Gatewood Fence & Gate Enterprise offers free estimates in Enterprise – call (833) 780-1547. Every job is backed by our 90-Day Done Right Promise, and there’s no trip charge inside the county.
Frequently Asked Questions
We don’t recommend it. The mechanical install is only half the job – the other half is the 120V power connection, the safety device commissioning, and the limit and force calibration, all of which have to be done to code. A motor installed without properly calibrated safety edges or force limits is a serious hazard. A gate motor should be installed by a licensed professional, and it needs a permit in most jurisdictions.
Opening the cover to look is safe if you’ve killed the breaker first, but the line-voltage side of the box is lethal and the low-voltage side is only safe if you’ve confirmed which is which. Beyond looking, opening the cover risks the warranty on the control board on brands like LiftMaster and Linear. If the job requires more than a look, call (833) 780-1547 for a free estimate in Enterprise.
In Enterprise summer heat, the most common cause is a failing battery in a solar-powered operator, followed by a gate that has racked out of alignment as the metal expanded. Start with a battery voltage test on a multimeter. If the battery is healthy, run the level and tape measure alignment checks. If either fails, call us – estimates are free.
Trace the conduit and check the wire gauge. Line voltage comes in through rigid or thick PVC conduit, usually 12 or 14 gauge, as a black/white/green set. Low voltage comes in thinner wire – 18 or 22 gauge – often with more conductors in a single jacket. When in doubt, treat it as line voltage until proven otherwise with a non-contact tester.
Yes. Dust and grit increase the friction the motor has to overcome every cycle, and friction is the leading cause of premature motor wear in desert climates. Cleaning and lubricating every three to four months during wind season, plus a seasonal alignment check, is the single most effective maintenance habit for a gate motor in Enterprise.
Every job we do carries a written 90-Day Done Right Promise – if the work isn’t right, one call brings us back to make it right. It’s not buried in fine print and it isn’t “in most cases.” It’s stamped in writing on every job. Ask about it when you call (833) 780-1547.
The Bottom Line
Reprogram remotes, clean terminals, adjust limits, keep the track greased, and run the alignment checks every season. Skip the 120V feed, the welding, and any job on a gate that’s out of alignment or guarding something that matters. That’s the whole line, and it comes down to three questions: does this job touch line voltage, does it touch the gate’s structure, or does it touch a security system? If any answer is yes, it belongs to a pro. If all three are no, take your time and do it yourself. And if the diagnosis isn’t clear, we’d rather talk it through on the phone for free than have you learn the hard way. Call (833) 780-1547 for a free estimate in Enterprise – we’ll tell you straight whether it’s worth doing yourself. For a full installation, the right starting point is our Gate Installation in Enterprise page, which walks through what a proper install involves. We’ve repaired what other companies wanted to replace for a long time, and that repair-first habit is exactly why we’ll tell you when a job is safe to do yourself.
Written by the team at Gatewood Fence & Gate Enterprise.